Set up two-step verification method
There are 3 ways to setup two-step verification method
- Microsoft Authenticator app
- Mobile device
- Office phone
Set up the Microsoft Authenticator app to send notifications.
Before you can add your account, you must download and install the Microsoft Authenticator app. If you haven't done that yet, follow the steps in the Download and install the app article.
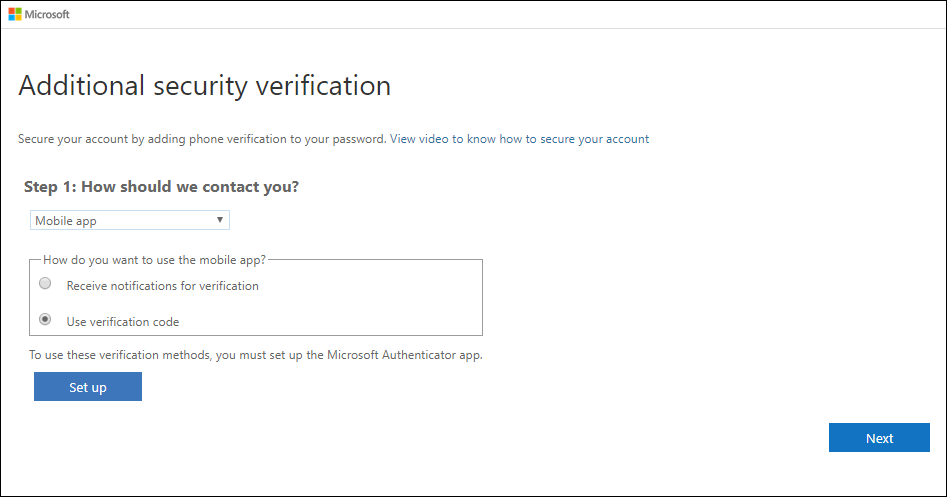
On the Additional security verification page, select Mobile app from the Step 1: How should we contact you area.
Select Receive notifications for verification from the How do you want to use the mobile app area, and then select Set up.

The Configure mobile app page appears.
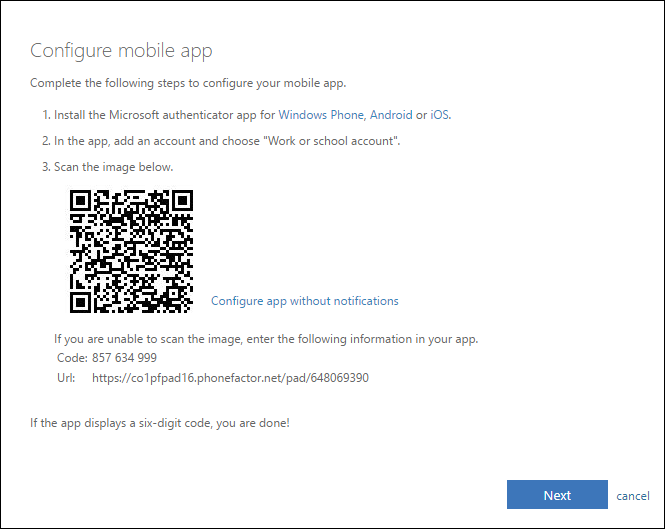
Open the Microsoft Authenticator app, select Add account from the Customize and control icon in the upper-right, and then select Work or school account.
Note: If you receive a prompt asking whether to allow the app to access your camera (iOS) or to allow the app to take pictures and record video (Android). select Allow so the authenticator app can access your camera to take a picture of the QR code in the next step. If you don't allow the camera, you can still set up the authenticator app as described in Manually add an account to the app.
Use your device's camera to scan the QR code from the Configure mobile app screen on your computer, and then choose Next.
Return to your computer and the Additional security verification page, make sure you get the message that says your configuration was successful, and then select Next. The authenticator app will send a notification to your mobile device as a test.

On your mobile device, select Approve.
On your computer, add your mobile device phone number to the Step 3: In case you lose access to the mobile app area, and then select Next. Microsoft recommends adding your mobile device phone number to act as a backup if you're unable to access or use the mobile app for any reason.
From the Step 4: Keep using your existing applications area, copy the provided app password and paste it somewhere safe.
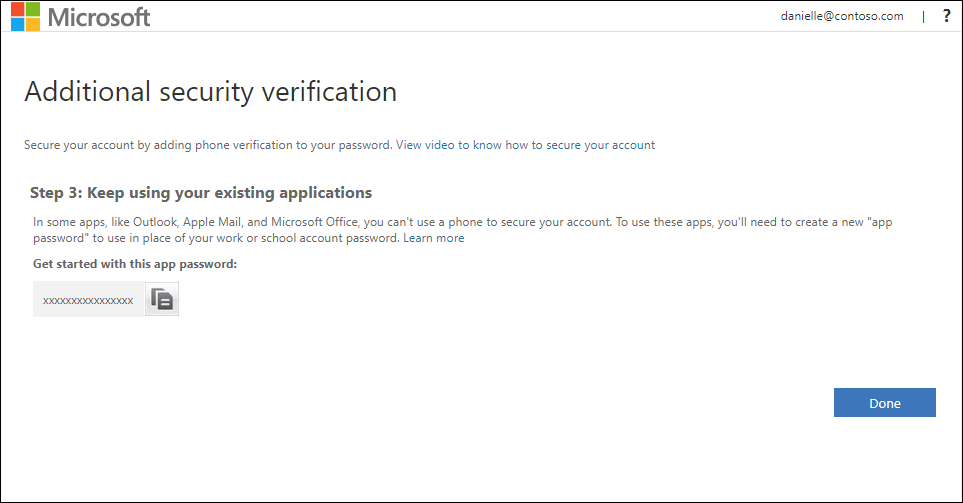
Select Done.
Set up the Microsoft Authenticator app to use verification codes.
Before you can add your account, you must download and install the Microsoft Authenticator app. If you haven't done that yet, follow the steps in the Download and install the app article.
On the Additional security verification page, select Mobile app from the Step 1: How should we contact you area.
Select Use verification code from the How do you want to use the mobile app area, and then select Set up.
The Configure mobile app page appears.
Open the Microsoft Authenticator app, select Add account from the Customize and control icon in the upper-right, and then select Work or school account.
Note: If you receive a prompt asking whether to allow the app to access your camera (iOS) or to allow the app to take pictures and record video (Android). select Allow so the authenticator app can access your camera to take a picture of the QR code in the next step. If you don't allow the camera, you can still set up the authenticator app as described in Manually add an account to the app.
Use your device's camera to scan the QR code from the Configure mobile app screen on your computer, and then choose Next.
Return to your computer and the Additional security verification page, make sure you get the message that says your configuration was successful, and then select Next. The authenticator app will send a notification to your mobile device as a test.
On your mobile device, select Approve.
On your computer, add your mobile device phone number to the Step 3: In case you lose access to the mobile app area, and then select Next. Microsoft recommends adding your mobile device phone number to act as a backup if you're unable to access or use the mobile app for any reason.
From the Step 4: Keep using your existing applications area, copy the provided app password and paste it somewhere safe.
Select Done.
Set up your mobile device to use a text message/call as your verification method.
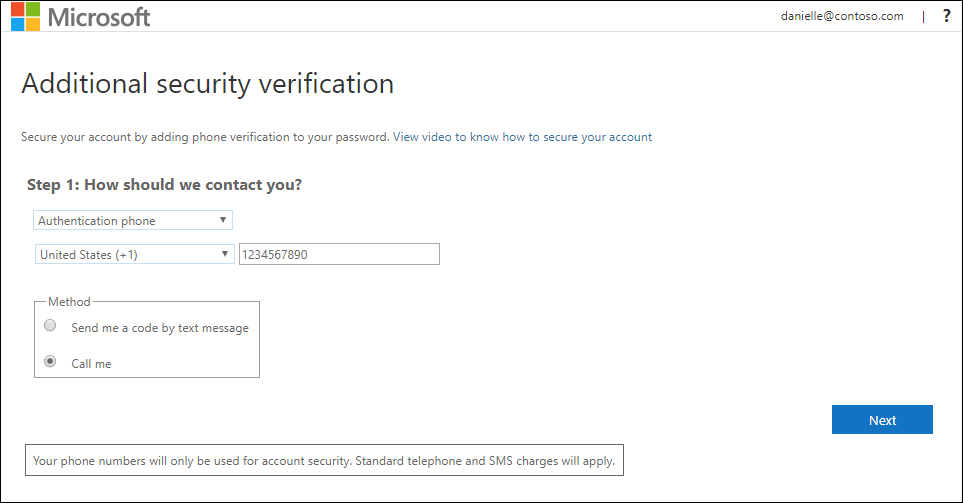
On the Additional security verification page, select Authentication phone from the Step 1: How should we contact you area, select your country or region from the drop-down list, and then type your mobile device phone number.
Select Send me a code by text message or Call me from the Method area, and then select Next.
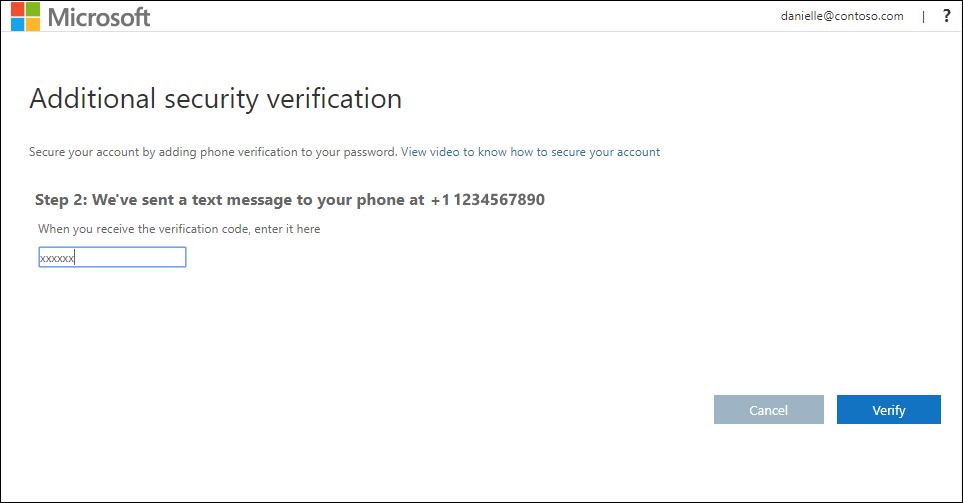
Type the verification code from the text message sent from Microsoft and then select Verify or press the hashtag (#) sign on your mobile if from a call.

From the Step 3: Keep using your existing applications area, copy the provided app password and paste it somewhere safe.
Select Done.
Set up your office phone number as your verification method.
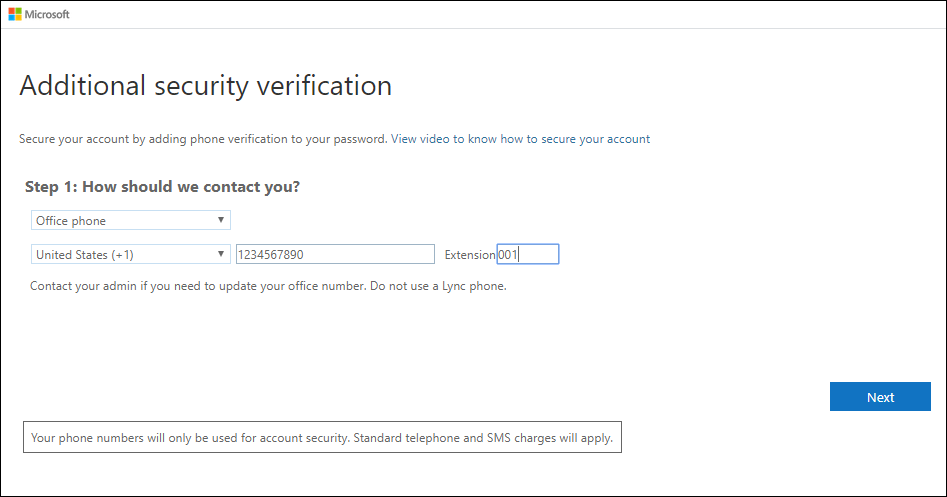
On the Additional security verification page, select Office phone from the Step 1: How should we contact you area, select your country or region from the drop-down list, type your office phone number, and then type your extension, if you have one.
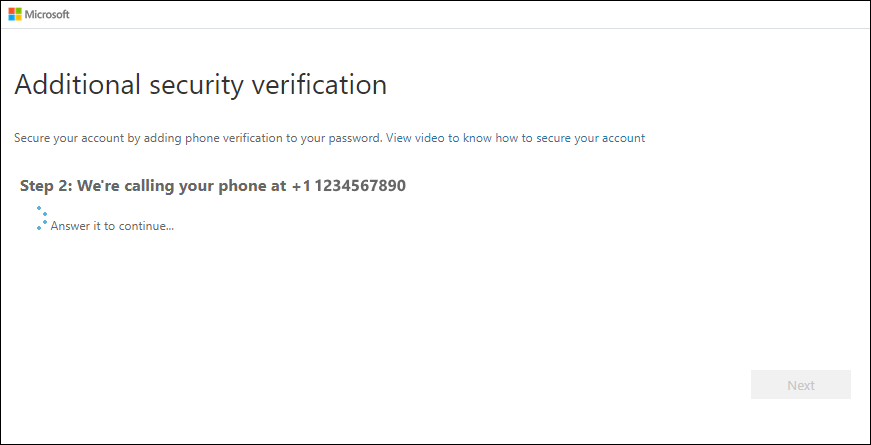
You'll receive a phone call from Microsoft, asking you press the pound (#) sign on your office phone to verify your identity.
From the Step 3: Keep using your existing applications area, copy the provided app password and paste it somewhere safe.
Select Done.
Related Articles
Set up email in the Outlook for Android app
Set up Outlook for Android for the first time 1. Install the Outlook for Android app from the Google Play Store and then open it. Tap Get Started if this is your first time. Otherwise, to add another email account, open the Menu > Settings > Add ...How to set status in Teams
If you want to make sure people know when you’re busy or away from your desk, set your status in Teams. The little dot on your profile indicates if you’re available or not. Teams will automatically set the status in some cases, like when you’re in a ...How to set up an Automatic Replies (Out of Office) from Outlook
There are two ways to send automatic out-of-office replies. The way you use depends on the type of email account you have. Please click here to see the complete guide on how to set up an automatic replies or watch the video below. Set up the Outlook app for iOS
1. Download Outlook for iOS from the iOS App Store and then open it. The icon looks like this: Note: See system requirements for your iOS devices here. 2. If it's your first time using Outlook for iOS, enter your full email address, then tap Add ...How to Set Categories, Flags, Reminders, or Colors in Outlook
Color categories allow you to easily identify and group associated items in Microsoft Outlook. Assign a color category to a group of interrelated items—such as notes, contacts, appointments, and email messages—so that you can quickly track and ...